🛠️ Best Practices for TypeScript CLI Tools and BDD Testing with Cucumber.js
A comprehensive guide to building professional TypeScript CLI tools with best practices for project structure, command parsing, user interaction, and BDD testing with Cucumber.js. Learn to create maintainable, user-friendly command-line interfaces following industry standards.


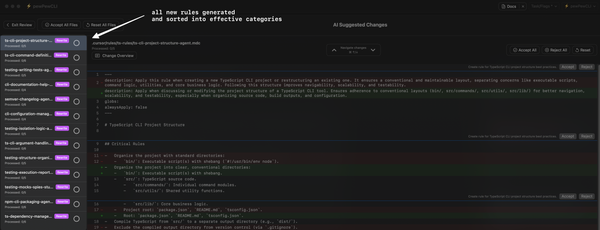
🏗️ Project Structure and Organization
Organize your CLI project in a clear, conventional structure. This makes the codebase easier to navigate and scale. A recommended layout is:
bin/– Contains the executable script(s) for your CLI (with a proper shebang). This is what runs when the CLI is invoked.src/commands/– Each command in its own module. This separation keeps command implementations modular and maintainable.src/utils/– Utility functions and helpers used across commands (e.g. formatting output, common validations).src/lib/– Core business logic of your tool, especially if it interacts with external APIs or performs complex operations.- Project root – Include essential files like
package.jsonandREADME.mdfor package metadata and documentation. TheREADME.mdshould outline installation and usage clearly.
Always place TypeScript source under src/ and compile to a separate output (e.g. dist/). Keep the compiled output out of version control. Maintain a strict TypeScript configuration (enable strict mode) to catch errors early. This structure ensures a clean separation between the CLI entry point and the logic, which is crucial for testability.
⌨️️ Command Definition and Parsing
Define CLI commands and options explicitly and follow widely accepted CLI conventions. Use a robust command-line parsing library like Commander.js or Yargs (both support TypeScript) to define commands, subcommands, and options. These libraries enforce POSIX-compliant syntax, which users expect. Best practices include:
- POSIX-Style Flags: Support short
-fand long--flagoptions. Single-letter flags should be prefixed with a single dash, and full-word options with--. Allow flags to be combined (-abcas alias for-a -b -c) for convenience. - Descriptive Commands: For multi-command CLIs, name commands after the action they perform (e.g.
init,generate). Provide a one-line description for each command in the help output. - Option Arguments: Use angle brackets
<arg>for required arguments and square brackets[arg]for optional ones in help text. This standard notation clearly communicates usage to users. - Default Commands: If your CLI has a primary action, consider making it the default when no subcommand is given. Otherwise, show the help if an unknown command is used.
Each command’s implementation should be encapsulated in a function or class (in src/commands). The command definition (using Commander/Yargs) should simply parse inputs and delegate to the implementation function. Never bury core logic inside the parsing layer – keep it separate. This makes the code easier to maintain and test.
💬 Argument Handling and Interactive Prompts
Handle command-line arguments rigorously and provide a good user experience for missing or invalid inputs. Always validate required arguments and options, and give clear error messages when something is wrong. Follow the “empathic CLI” approach: instead of failing on a missing required input, prompt the user interactively when appropriate. For example, if a required parameter is not provided, the CLI can fall back to asking the user via an interactive prompt, thus turning a potential error into a guided interaction.
Use Inquirer.js (a standard library for CLI prompts) to implement interactive questions when needed. Best practices for interactive prompts include:
- Only Prompt When Necessary: Do not force interaction if information can be reliably auto-detected or provided via arguments. For example, if a configuration value can be read from an env variable or config file, use it instead of asking the user every time (zero-configuration principle).
- Use Rich Prompt Types: Leverage confirm dialogs for yes/no, lists for multiple choice, password prompts for secrets, etc., instead of free-text for everything. This makes input less error-prone and more user-friendly (e.g. using checkboxes or auto-complete for known values).
- Graceful Defaults: Provide sensible default values in prompts and option definitions. Defaults should be indicated in the help text. This speeds up usage for common cases.
- Skippable/Non-Interactive Mode: Ensure your CLI can run non-interactively as well. Provide flags like
--yesto skip confirmations or detect CI environments to avoid hanging on prompts. Always allow opting out of interactivity if running in a script or unsupported terminal.
When designing prompt flows, remember that a CLI might be used in pipelines. Always time-out or provide a non-interactive alternative for prompts so automation doesn’t stall. Also, respect standard env vars like NO_COLOR or a CI flag to modify behavior appropriately (e.g. disable color or animations and avoid prompts in CI).
⚙️ Configuration Management
Implement a robust configuration management strategy for your CLI tool. Configuration can come from multiple sources, and your tool should support a clear order of precedence:
- Command-line arguments (highest priority)
- Environment variables (next priority)
- Project-level config files (e.g. a config in the current project directory)
- User-level config (e.g. in the user’s home directory,
~/.myclircor under~/.config/…) - System-level config (if applicable)
Always let explicit CLI arguments override anything else. For environment variables, adopt conventional names (for example, MYCLI_TOKEN for an API token) and document them. Use a config library or loader (like cosmiconfig or similar) to search for config files in standard locations. Follow the XDG Base Directory spec for where to store user config and data files – e.g. use ~/.config/yourapp/config.json rather than cluttering the home directory with custom dotfiles.
Stateful Configuration: Persist user preferences to avoid forcing repetitive input. For instance, if a user provides an API key the first time, store it securely so subsequent runs don’t ask again. Use a well-vetted config store (like the conf or configstore packages) that respects the OS conventions for config paths. This provides a seamless experience between invocations of your CLI (remembering past inputs, tokens, etc.) and reduces annoyance of retyping the same info.
Always document the configuration hierarchy. In your help output or docs, explain how config values are determined (e.g. “Command-line flag --foo overrides FOO env var, which overrides the value in the config file.”). This transparency helps users understand and customize the CLI’s behavior.
📦 Dependency Management and Code Modularization
Manage your dependencies carefully and keep the code modular:
- Minimal Dependencies: Limit external dependencies to what is truly needed. A smaller dependency footprint means faster installs and fewer potential security issues. Each additional package can slow down global installation (especially when users invoke your CLI via
npxeach time). Vet your dependencies (and their transitive deps) for size and quality to avoid bloating the CLI. - No “Reinventing the Wheel”: That said, do leverage well-known libraries for standard needs (argument parsing, prompting, config). Don’t hand-roll functionality that a reliable library already provides – this ensures consistency and reduces bugs. Strike a balance between too many dependencies and not writing unnecessary custom code.
- Lock Versions: Use a lockfile (
package-lock.jsonor annpm-shrinkwrap.json) to pin dependency versions for your published CLI. This guarantees that users installing your CLI get tested, known-good versions of dependencies. Automated tools can handle updating these in a controlled way. - Modular Code Structure: Follow SOLID principles within your code. Separate concerns by dividing logic into distinct modules (as noted in the project structure). For example, parsing/validation logic can be in one module, business logic in another, and output formatting in another. This makes each part easier to test in isolation.
- Dependency Injection for External Services: If your CLI interacts with external systems (like making HTTP requests, or reading/writing files), abstract those interactions behind interfaces or modules. This way, you can inject mock implementations during testing (see Testing section) and swap out components easily. Never hard-code calls to external services without an abstraction, as that makes testing and maintenance harder.
By modularizing, you also enable reuse of your CLI’s core logic as a library, if needed. Users could programmatically require your CLI’s modules for scripting purposes. Therefore, design modules with clear APIs and minimize inter-module coupling.
🚀 Packaging and Publishing as a Global NPM Tool
When preparing your CLI for distribution via npm, follow best practices so it installs and runs smoothly for users:
- Shebang: Ensure the entry file (e.g.
bin/index.jsor the compileddist/index.js) has a proper shebang line at the top:#!/usr/bin/env node. This makes it directly executable in Unix environments by locating the Node.js runtime automatically. Avoid hard-coding a Node path in the shebang (like#!/usr/local/bin/node), as it may not exist on all systems. - Cross-Platform Considerations: Use Node’s cross-platform path and spawning utilities. For example, if your CLI spawns other processes or scripts, invoke
nodeexplicitly (e.g.child_process.spawn('node', [script.js])rather than executing a script by relative path) to avoid issues with shebang on Windows. Also, handle differences in file paths (usepath.joininstead of manual string concatenation for paths). - Pre-Publish Checks: Before publishing, test your CLI locally by installing it globally (e.g. via
npm linkornpm pack). Verify that running the command works on a clean system, the help text is accessible, and no dev-only files are needed at runtime. - Global Install Guidelines: Clearly instruct users to install your package globally (
npm install -g yourcli). If your CLI can also be used vianpx yourcli, mention that as an option for one-off usage. Keep startup time snappy – avoid heavy initialization so that evennpx(which reinstalls on each invocation) is quick. - Engine Compatibility: Specify the Node engine requirement in your
package.json(e.g."engines": {"node": ">=16.0"}) if you rely on modern Node features. This helps users know the prerequisites and prevents installation on unsupported Node versions.
Executable Entry: In your package.json, use the "bin" field to specify the CLI executable name and the path to its startup script. For example:
"bin": {
	"mycli": "./dist/index.js"
}
This maps the command name mycli to your compiled entry file. Upon global install, npm will symlink this to the user’s PATH.
When publishing updates, adhere to semantic versioning (see below) so users (and tools like npm or semantic-release) can manage upgrades predictably. Provide a changelog or release notes for each release so users know what changed.
🏷️ Versioning, Changelogs, and Semantic Release Conventions
Adopt Semantic Versioning (SemVer) for your CLI project and maintain clear changelogs. Under SemVer, every release version conveys meaning about the changes:
- MAJOR version: incremented for incompatible API or CLI interface changes (breaking changes). E.g. removing a command or changing its behavior in a non-backward-compatible way.
- MINOR version: incremented when new features or commands are added in a backwards-compatible manner. E.g. adding a new subcommand or option that doesn’t break existing usage.
- PATCH version: incremented for backwards-compatible bug fixes.
Always update the version accordingly before publishing, and tag releases in your source control. Maintain a CHANGELOG.md that lists notable changes for each version (date and summary of additions, changes, fixes). Follow the Keep a Changelog format or a similar standard for consistency (e.g. categorize changes into Added, Changed, Fixed, Removed).
For automating releases, consider using conventional commits and tools like semantic-release. By enforcing a convention in commit messages (for example, Angular commit message format: feat: ..., fix: ..., docs: ...), you enable automation to determine release versions and generate changelog entries. Semantic-release or similar will parse commits to decide if the next release is a major, minor, or patch, and can automatically publish to npm and update the changelog. This ensures your versioning is strictly tied to documented changes and removes human error from the process.
Changelog Best Practices: Every user-facing change should be documented. Write changelog entries in plain language, focusing on how the release affects users (e.g. “Added: new --verbose flag to show detailed output” or “Changed: the init command now writes to ~/.mycli/config.json instead of the current directory”). This goes hand-in-hand with versioning: users should be able to glance at the changelog and understand if an update is major (potentially breaking) or minor.
In summary, never skip updating the version or changelog for a release. Adhering to semantic versioning and clear changelogs builds trust with your users, as they can upgrade with confidence and know what to expect from each new version.
📚 Documentation and Help Output
Provide comprehensive documentation and built-in help for your CLI:
- Help Command: Your CLI must support
-h/--helpand output usage instructions for all commands and options. Libraries like Commander generate help text automatically if you define.description()and.option()for each command. Ensure the help text includes a brief summary of each command, required vs optional arguments, and available global options. The formatting should follow Unix conventions (usage synopsis, then options list, then examples). - Usage Examples: Include real-world usage examples in the help output or documentation. For complex commands, showing an example invocation and its outcome is invaluable for users. Many CLI help sections have an “Examples:” section – make sure to provide one for clarity.
- Man Page or
–helpDetail: For very intricate CLIs, consider offering extended help (for exampleyourcli help <command>for detailed docs on a subcommand). However, a well-structured--helpoutput is usually sufficient if kept up-to-date. - README Documentation: The project README should serve as a quickstart guide. At minimum, document how to install the CLI, a quick usage snippet, and list the primary commands and options. Use clear, terse language and avoid assuming prior context. Many users will read the README on GitHub or npm, so it should contain the necessary info to get started and a link to more detailed docs if available.
- Consistency: Ensure the documentation matches the actual behavior of the CLI. If an option or command is changed or deprecated, update the help text and README in the same commit as the code change to avoid drift.
- Output Standards: Make the CLI output informative but not overwhelming. By default, print concise success messages or results. Use color highlighting to make important text stand out (e.g. errors in red, headings in bold), but also support a plain output mode (no color) for scripting or accessibility. For machine-consumable output, consider a
--jsonflag to output structured JSON instead of pretty text, if applicable. - Error Messages: (Related to documentation) When usage errors occur (e.g. unknown command, missing argument), provide an error message and remind the user how to get help. For example: “Error: missing required
<filename>argument. Usemycli cmd --helpfor more information.” This guides users to the documentation instead of leaving them frustrated.
Remember that good documentation and help output significantly improve the user experience and reduce support requests. Treat the help text as part of the user interface – polish it as you would your code.
🥒 Unit Testing with BDD (Cucumber.js)
Implement unit-level tests using Behavior-Driven Development principles with Cucumber.js to ensure each component of your CLI works as expected. Cucumber allows writing test scenarios in plain language (Gherkin syntax) which can then be linked to step definition code. To effectively test a CLI tool at the unit level, follow these conventions:
📂 Test Folder Structure and Setup
Keep your tests separated from the main source. A common approach is to have a top-level features/ directory for Cucumber feature files and related test code. For example:
features/– contains.featurefiles written in Gherkin that describe behaviors (scenarios).features/step_definitions/– contains the step definition implementations in TypeScript. You can organize step defs by feature or command.features/support/(optional) – for support code like custom World classes or hooks (before/after). This is where you might define shared context or setup/teardown logic for scenarios.
Configure Cucumber.js to pick up your TypeScript files. You may use ts-node when running Cucumber, or precompile the test code. In your package.json, define a script like "test:bdd": "cucumber-js --require-module ts-node/register --require features/step_definitions/**/*.ts features/**/*.feature". This tells Cucumber to transpile TS and load step definitions. Ensure your Cucumber (Gherkin) syntax is recognized in your editor by installing any necessary language support.
✍️ Writing Feature Files and Step Definitions
Write Gherkin feature files to cover the expected behaviors of your CLI commands. Each feature file contains scenarios that describe a specific aspect or command of the CLI in Given/When/Then format. For example:
Feature: Initialize a new project

	Scenario: User initializes with a name
	Given I am in an empty directory
	When I run "mycli init --name MyProject"
	Then a new project named "MyProject" should be created
	And the output should include "Project initialized successfully"
Scenarios should be brief and focus on one behavior or outcome. Use background sections or scenario outlines if you need to reduce repetition, but keep each scenario independent.
For each step in the feature files, implement a matching step definition in TypeScript:
import { Given, When, Then } from '@cucumber/cucumber';

Given('I am in an empty directory', function() {
	// setup code: e.g., create a temp dir, change working directory
});

When('I run {string}', async function(command: string) {
	// execute the CLI command, e.g., call the CLI entry point or spawn a process
});

Then('a new project named {string} should be created', function(projectName: string) {
	// assert that the expected output (e.g., a directory or files) exist
});

Then('the output should include {string}', function(expectedText: string) {
	// assert that captured CLI output contains expectedText
});
The step definitions are the “glue” between the plain language and your code. Cucumber will parse the step lines and execute the corresponding code. Use regex or Cucumber expressions to extract parameters (e.g. {string} in the step becomes a function argument). Each step has access to a shared context via this (the World, see below).
Keep step definitions focused – do minimal work in them. They should delegate to helper functions or directly call your CLI logic. For example, a When step for running a command should ideally call a function like runCliCommand(command, args) which you wrote to invoke your CLI. This keeps test code clean and reusable across steps.
🌍 Using the Cucumber World for Shared State
Cucumber.js provides a World object for each scenario, which is a fresh context to store state during that scenario’s execution. Leverage the World to share information between steps:
- Define a custom
Worldclass (or interface in TypeScript) if you need to store specific data (such as the output of the CLI, exit code, or any test fixtures). For example, yourWorldmight have properties likelastExitCode,lastOutput, or helper methods to run the CLI and capture results. - Use this shared state in your
Given/When/Thensteps. For example, theWhen I run "mycli init"step can capture the output and exit code intothis.lastOutputandthis.lastExitCode. Then an assertion step can read those from the World to verify behavior.
Register your World with Cucumber. In a features/support/world.ts file, you can set:
import { setWorldConstructor, World } from '@cucumber/cucumber';

interface ICLIWorld extends World {
	lastOutput: string;
	lastExitCode: number;
	// ... any other shared state or methods
}

class CLIWorld extends World implements ICLIWorld {
	public lastOutput: string = '';
	public lastExitCode: number = 0;

	constructor(options: any) {
	super(options);
	}
}

setWorldConstructor(CLIWorld);
Now, within any step definition, this will be typed as CLIWorld (or ICLIWorld) and you can set or read this.lastOutput, etc.
The World is recreated for each scenario, so scenarios are isolated. This means you can use the World to carry over state within a scenario, but not across scenarios (which is good for test independence). Avoid using global variables in tests – use the World instead for anything that multiple steps in the same scenario need to access.
🔬 Isolating CLI Logic for Testability
To test the CLI at a unit level, structure your code so that the core logic can be invoked outside of the actual CLI process. In practice, this means designing functions or classes for each command’s functionality and calling those in your step definitions, rather than always spawning a new subprocess.
Separate I/O from Logic: Write your CLI such that reading input and writing output are abstracted. For example, a command function might accept an input string (or parameters) and return a result (or have a callback for output) instead of directly using process.stdin/stdout. This allows you to call that function in tests with in-memory inputs and capture its output easily.
Most CLI frameworks (like Commander) allow programmatic execution. For instance, you can require your CLI’s main module and call the command’s action handler function directly. Take advantage of this: don’t exclusively rely on end-to-end shell execution in tests, which can be slow and harder to control. Instead, call the underlying functions with test parameters. This approach is suggested by Cucumber contributors as well – you can test internals directly with only a few tests covering the actual CLI parsing.
Example: If init is implemented in src/commands/init.ts as an exported function initProject(name: string): number, your step might do:
// Assuming initProject is imported
When('I run "mycli init --name {string}"', async function(this: ICLIWorld, projectName: string) {
	// call the command logic directly
	try {
	// Assuming initProject returns exit code or throws on error
	// And maybe logs output which we capture differently or mock
	this.lastExitCode = initProject(projectName);
	this.lastOutput = "Project created"; // Or capture actual logs
	} catch (e: any) {
	this.lastExitCode = 1; // Or specific error code
	this.lastOutput = e.message;
	}
});
This way, you bypass the CLI parsing (which you can assume Commander handles) and directly test the effect of the command. It’s faster and lets you inject conditions (like throwing errors) more easily.
Reserve a few integration tests for the full end-to-end CLI (spawning the process with child_process.execSync or similar) to ensure the wiring is correct, but primarily test the logic in isolation as above. This keeps the test suite efficient and focused.
🎭️ Mocks, Spies, and Stubs in BDD Tests
Unit-level BDD tests often need to simulate or observe interactions such as file system access, network calls, or user prompts. Use mocks and spies to control these side effects in your Cucumber steps:
- File System: If your CLI reads from or writes to files, avoid doing so on the real file system during tests. Instead, use a temp directory (cleaned up after each scenario) or a mock file system. You can set up a dummy directory structure in a
Givenstep (e.g. “Given I have a config file with content X”) and point your CLI logic to that (perhaps by setting an environment var or injecting a path). For writing, after theWhenstep, check the file output in the temp directory. Libraries likemock-fscan simulate a file system in-memory, or you can simply use Node’sos.tmpdir()for real but isolated file ops. - Network Calls: External HTTP requests should be stubbed so tests don’t depend on external services. If your CLI uses
fetch/axiosor any request, inject a fake implementation in tests. For example, setprocess.env.NODE_ENV='test'and in your code, if in test mode, use a mock API client that you control. In step definitions, you can then preset expected responses. This approach was noted as a strategy: abstract API calls so that whenAPP_ENVor similar is “test”, it uses mocks provided in the step definitions. - Spies on Output: To verify that your CLI prints correct messages, you can spy on
console.logor whatever logger you use. For instance, in aBeforehook, replaceconsole.logwith a spy function that appends messages tothis.lastOutput. Then your steps can inspectthis.lastOutput. Make sure to restore the originalconsole.logafter the scenario. This avoids relying on reading stdout from a child process. - Stubbing Time or Randomness: If your tool does anything time-based or random (like timestamps, random IDs), use dependency injection or global stubs so that tests can fix those values. For example, if a file created has a timestamp in its name, allow injecting a clock or use a library like
sinonto stubDate.now()during the test.
User Prompts: Testing interactive prompts can be tricky. In tests, you should simulate user input instead of actually waiting for a person to type. One way is to stub Inquirer’s prompt method. Before running the code that triggers a prompt, override inquirer.prompt to return a promise with predefined answers. For example, if the CLI will call await inquirer.prompt([{ name: 'continue', type: 'confirm' }]), in your step definition do something like:
import * as inquirer from 'inquirer';
// ... in a Given step or before the When:
const originalPrompt = inquirer.prompt; // Store original
(inquirer as any).prompt = async () => ({ continue: true });
// ... run the command ...
inquirer.prompt = originalPrompt; // Restore after
This way, when the CLI code calls the prompt, it immediately gets { continue: true } as if the user confirmed. This technique (monkey-patching the prompt) provides a deterministic response in tests. Reset the prompt function after if needed.
Using these techniques, your BDD tests remain unit-level: each scenario isolates one component or behavior with all external interactions controlled. The scenarios should run quickly and reliably without flaky external dependencies.
Finally, ensure your test suite itself is well-documented and part of your development workflow. Run the Cucumber tests in CI to prevent regressions. When writing new features, add scenarios (this is the essence of BDD: write the scenario first, then implement). The plain-language nature of Gherkin means these scenarios double as documentation for how the CLI is supposed to behave, which is a great side benefit.
In summary, by following the above best practices, you will build a robust, user-friendly TypeScript CLI tool and an accompanying suite of BDD-style tests. The CLI will have a clean architecture (easy to maintain and extend), adhere to proven conventions for usability, and be thoroughly tested in behavior terms. This ensures confidence in making changes and releasing updates, knowing that both your implementation and the user experience are well-defined and verified by your Cucumber.js tests.